
A Neon Led Strip is a flexible lighting system designed to imitate traditional glass neon. It usually combines closely spaced LEDs, silicone diffusion, a circuit board, and a low-voltage power supply. The silicone body spreads light across the tube, reducing visible bright spots. Its soft glow suits signs, retail shelves, hospitality interiors, bedrooms, and architectural edges.
The technology is simple, but the engineering is not. Electrical current passes through LEDs, creating light with less heat than conventional neon tubes. A controller can adjust brightness, color, animation, or white-light temperature. However, voltage drop can dim longer runs near the far end. Heat buildup can also shorten LED life. Good installation needs correct wattage, aluminum mounting, waterproof connectors, and an appropriately rated driver.
The U.S. Department of Energy reports that LED products can use at least 75% less energy than incandescent lighting and last much longer. Grand View Research also identifies strong growth in the global LED lighting market, driven by energy efficiency and smart-control adoption. These figures support the category’s momentum, although strip-light performance varies greatly between products. Dr. Nadarajah Narendran, a leading LED researcher at Rensselaer Polytechnic Institute, has stated, “LEDs are not just a light source; they are a system.” That idea matters here. A Neon LED Strip is not merely decorative tubing. It is a coordinated product involving optics, thermal management, electrical design, and installation quality. The marketing can look perfect. Real-world results are less predictable.
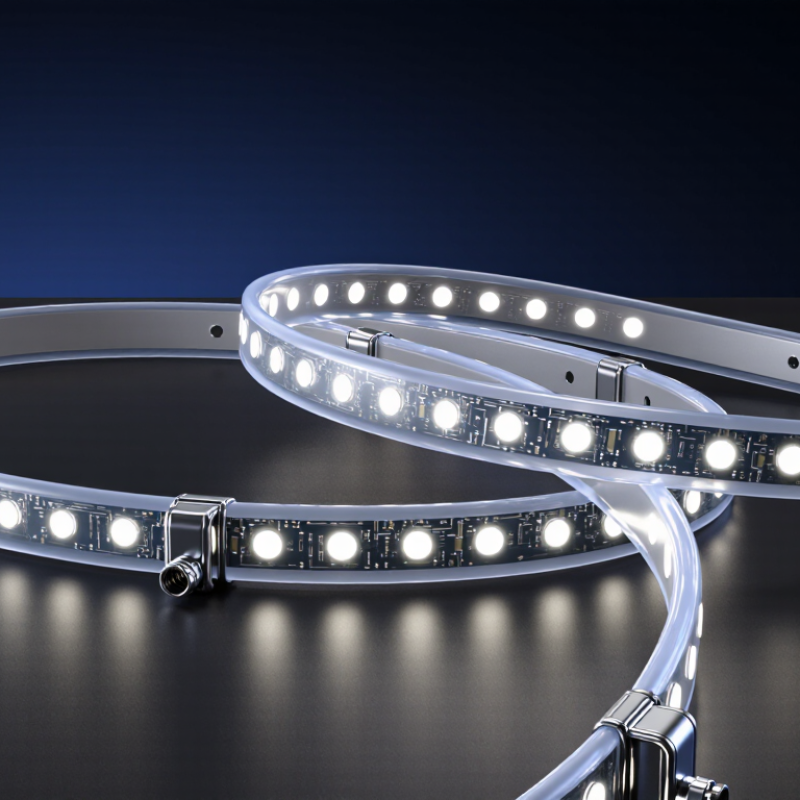
A neon LED strip is a flexible lighting product designed to imitate traditional glass neon. It uses small LEDs inside a silicone or polymer diffuser. The diffuser spreads each diode’s sharp point into a continuous line of light. This creates smooth curves around signs, shelves, counters, and architectural edges.
Unlike glass neon, it usually runs at low voltage through a suitable power supply. The LEDs convert electrical energy into light when current passes through semiconductor materials. A flexible circuit board carries the current along the strip. Cut marks show where sections can be separated, although cutting outside these points may damage the circuit. The outer jacket also helps protect the strip from dust, moisture, and accidental contact. Protection levels still vary, so wet-location claims need careful checking.
The U.S. Department of Energy reports that LED lighting can use at least 75% less energy than incandescent lighting and last up to 25 times longer. These figures support LED adoption, but they do not guarantee identical results for every neon strip. Heat, voltage stability, bending radius, and installation quality matter greatly. In practical installations, poor ventilation can shorten service life. I have seen attractive lighting fail early because the power supply was undersized. That detail is easy to miss. A reliable assessment should check brightness, color consistency, thermal management, ingress protection, and replacement access before installation.
A neon LED strip produces light through tiny semiconductor diodes mounted along a flexible circuit board. When direct current passes through each diode, electrons meet positively charged holes inside the semiconductor junction. Their recombination releases energy as visible photons. This process is called electroluminescence. It creates light with far less heat than an incandescent filament.
The silicone jacket does not create the light. It spreads and softens it, producing the continuous neon appearance. Many strips use blue diodes with a phosphor layer, which converts part of the blue energy into broader white light. Others mix red, green, and blue diodes to create colored effects. The U.S. Department of Energy reports that LED lighting can use at least 75% less energy and last up to 25 times longer than incandescent lighting. That efficiency comes from controlled semiconductor conversion, not from the silicone tubing.
Performance still depends on current, diode spacing, voltage stability, and heat removal. A high-density strip can look smoother but may draw more power. A cheaper diffuser may show dark points at close range. The International Energy Agency estimates that lighting represents about 15% of global electricity use, so small efficiency improvements matter. Yet the picture is not perfectly clean. Marketing figures often describe laboratory performance, while installed strips may lose brightness through heat, long wiring, or aging. Testing the actual strip under working conditions remains important.
A neon LED strip is a flexible lighting system built from several working layers. Its core is a flexible printed circuit board, or PCB, carrying small light-emitting diodes, copper pathways, and current-limiting resistors. The LEDs convert electrical energy into light when current passes through semiconductor chips. A power supply changes household AC electricity into safer low-voltage DC power. Controllers can adjust brightness, color, or animated effects.
The outer silicone or PVC diffuser shapes the familiar neon appearance. It spreads light and hides harsh LED points, creating a smoother glow through walls, signs, or furniture edges. Waterproof versions add sealed jackets and protected connectors, while adhesive backing helps installation. However, adhesive can weaken on dusty, hot, or uneven surfaces. The U.S. Department of Energy reports that LED lighting can use at least 75% less energy and last up to 25 times longer than incandescent lighting. The IEA’s Energy Efficiency 2023 report also identifies lighting as a major global electricity-use category. These figures support LED efficiency, but actual results depend on heat control, voltage stability, and installation quality.
Tips: Measure the run before buying. Check voltage, wattage per metre, IP rating, and cutting marks. Leave ventilation around the power supply. A small mistake matters: excessive length can cause voltage drop, making the far end visibly dimmer. Diffusers improve appearance, but they may reduce brightness slightly. Test every section before permanent mounting.
What Is a Neon LED Strip and How Does It Work?
Neon LED strips use closely spaced light-emitting diodes inside a flexible diffuser. The diffuser spreads light across the surface, creating a smooth neon-like line. Unlike traditional glass neon, these strips usually operate at low voltage and produce less heat. Their light is controlled by a power supply, and some models include dimming or color-control functions.
What Types of Neon LED Strips Are Available?
Single-color neon LED strips are practical for signs, shelves, bedrooms, and architectural edges. Common colors include warm white, cool white, red, blue, and green. RGB versions mix red, green, and blue diodes to create changing colors. RGBW models add a dedicated white diode, which usually provides more natural white light.
The strip’s bending direction also matters. Top-bend types curve across their front surface, while side-bend types turn more easily around corners and circular shapes. Some flexible neon products support both directions, but their minimum bend radius still requires careful checking. It is easy to assume “flexible” means bendable anywhere. It does not.
Silicone-sheathed strips generally resist moisture, ultraviolet exposure, and temperature changes better than unprotected versions. Outdoor installations should be checked for a suitable IP rating, sealed connections, and proper heat management. A recessed profile can create a cleaner line, while a surface-mounted profile installs faster. In my experience, the brightest option is not always the best choice; glare, viewing distance, and the surrounding wall can change the result considerably.
Installing a neon LED strip starts with accurate planning. Measure the route twice, including corners and connection points. A small mistake here creates visible gaps later. Decide where the power supply will sit before fixing the strip.
Clean the surface with a dry, lint-free cloth. For permanent installation, use mounting clips or a suitable adhesive channel. The channel keeps the strip straight and improves heat dissipation. Never bend it sharply; follow the stated minimum bend radius. Cut only at the marked points. Connect sections with compatible connectors, then check polarity before applying power. I prefer testing every section on a workbench first. It saves time, although I still occasionally miss a loose connector.
Choose a power supply with enough capacity for the total strip length. Leave a safety margin of about 20 percent. Keep electrical connections inside suitable enclosures, especially in kitchens, bathrooms, or outdoor areas. Waterproof models still need sealed joints. They are not automatically safe when submerged. A qualified electrician should handle fixed mains wiring.
After installation, the strip can provide accent lighting beneath cabinets, around signage, along stairs, or behind furniture. Use a compatible dimmer for softer evening light. Avoid covering the strip with insulation or tightly packed materials. Dust the diffuser gently and inspect for flickering, dark sections, or warm connectors. A slightly uneven wall may remain visible, despite careful work. That is worth checking before calling the installation finished.
| Data Dimension | Typical Information | Practical Notes |
|---|---|---|
| Product Definition | A flexible LED light source enclosed in a continuous silicone or polymer diffuser. | The outer diffuser creates a smooth, uniform line of light and protects the LEDs from direct contact. |
| How It Works | Electrical current passes through light-emitting diodes mounted on a flexible circuit board. | A diffuser spreads and blends the individual LED points into a continuous neon-like appearance. |
| Common Input Voltage | 5 V, 12 V, or 24 V DC, depending on the product design. | The power supply must match the strip's rated voltage. Never connect a low-voltage strip directly to household mains electricity. |
| LED Density | Common configurations range from approximately 30 to more than 120 LEDs per meter. | Higher density generally improves light uniformity, but it may also increase power consumption and heat output. |
| Power Consumption | Common products use about 4–15 watts per meter; exact consumption varies by LED density, color, and brightness. | Choose a power supply with suitable capacity. A reserve of about 20% is commonly allowed for reliable operation. |
| Light Colors | Available options may include warm white, neutral white, cool white, red, green, blue, amber, RGB, and RGBW. | White versions are suited to general illumination, while color-changing versions are commonly used for decorative and accent lighting. |
| Brightness Measurement | Brightness is commonly described using lumens per meter, although specifications vary by design and color. | Compare products using the same measurement method and color temperature when evaluating brightness. |
| Cutting | Cutting is permitted only at marked cut points, often spaced every few centimeters. | Cutting between marked points can damage the circuit or leave a section unable to operate. |
| Bending Direction | Some neon LED strips bend horizontally, while others bend vertically; specialized designs may support both directions. | Follow the stated minimum bend radius and avoid twisting, folding, or sharply creasing the strip. |
| Water Resistance | Ingress protection varies. Indoor versions may have limited protection, while sealed versions can be rated for damp or outdoor locations. | The rating applies only when connectors, end caps, and joints are properly sealed. Do not assume every neon LED strip is waterproof. |
| Installation Surface | Suitable surfaces are generally clean, dry, smooth, and free of oil, dust, and loose particles. | Mounting clips, channels, or profiles can provide stronger support than adhesive alone, especially outdoors or on curved surfaces. |
| Basic Installation Sequence | Measure, plan the route, cut at marked points, attach connectors, mount the strip, connect the controller if needed, and test the circuit. | Testing before final mounting helps identify polarity, connector, power-supply, or section problems early. |
| Control Methods | Options may include an on/off switch, dimmer, remote controller, timer, motion sensor, or smart lighting controller. | The controller must be compatible with the strip's voltage, current, channel type, and color system. |
| Typical Applications | Architectural outlines, ceiling coves, stair edges, cabinets, shelves, signage, furniture, vehicles, hospitality spaces, and event decoration. | Use the appropriate brightness, color, bend direction, and protection rating for the environment. |
| Heat Management | Although LEDs are efficient, they still produce heat, particularly at higher power levels. | Avoid covering the strip with insulating materials and use an aluminum profile when additional heat dissipation is required. |
| Electrical Safety | Power should be disconnected before cutting, wiring, or modifying the strip. | Use correctly rated wiring, connectors, fuses, and power supplies, and follow local electrical regulations for permanent installations. |